
Setting up your “Free Risk Analysis” Outlook signature on a Mac is slightly different than on a PC. You will first want to click on the “?” in the bottom right side of your HiddenLevers account and click on “Marketing Kit”.

Select the Outlook box highlighted below.
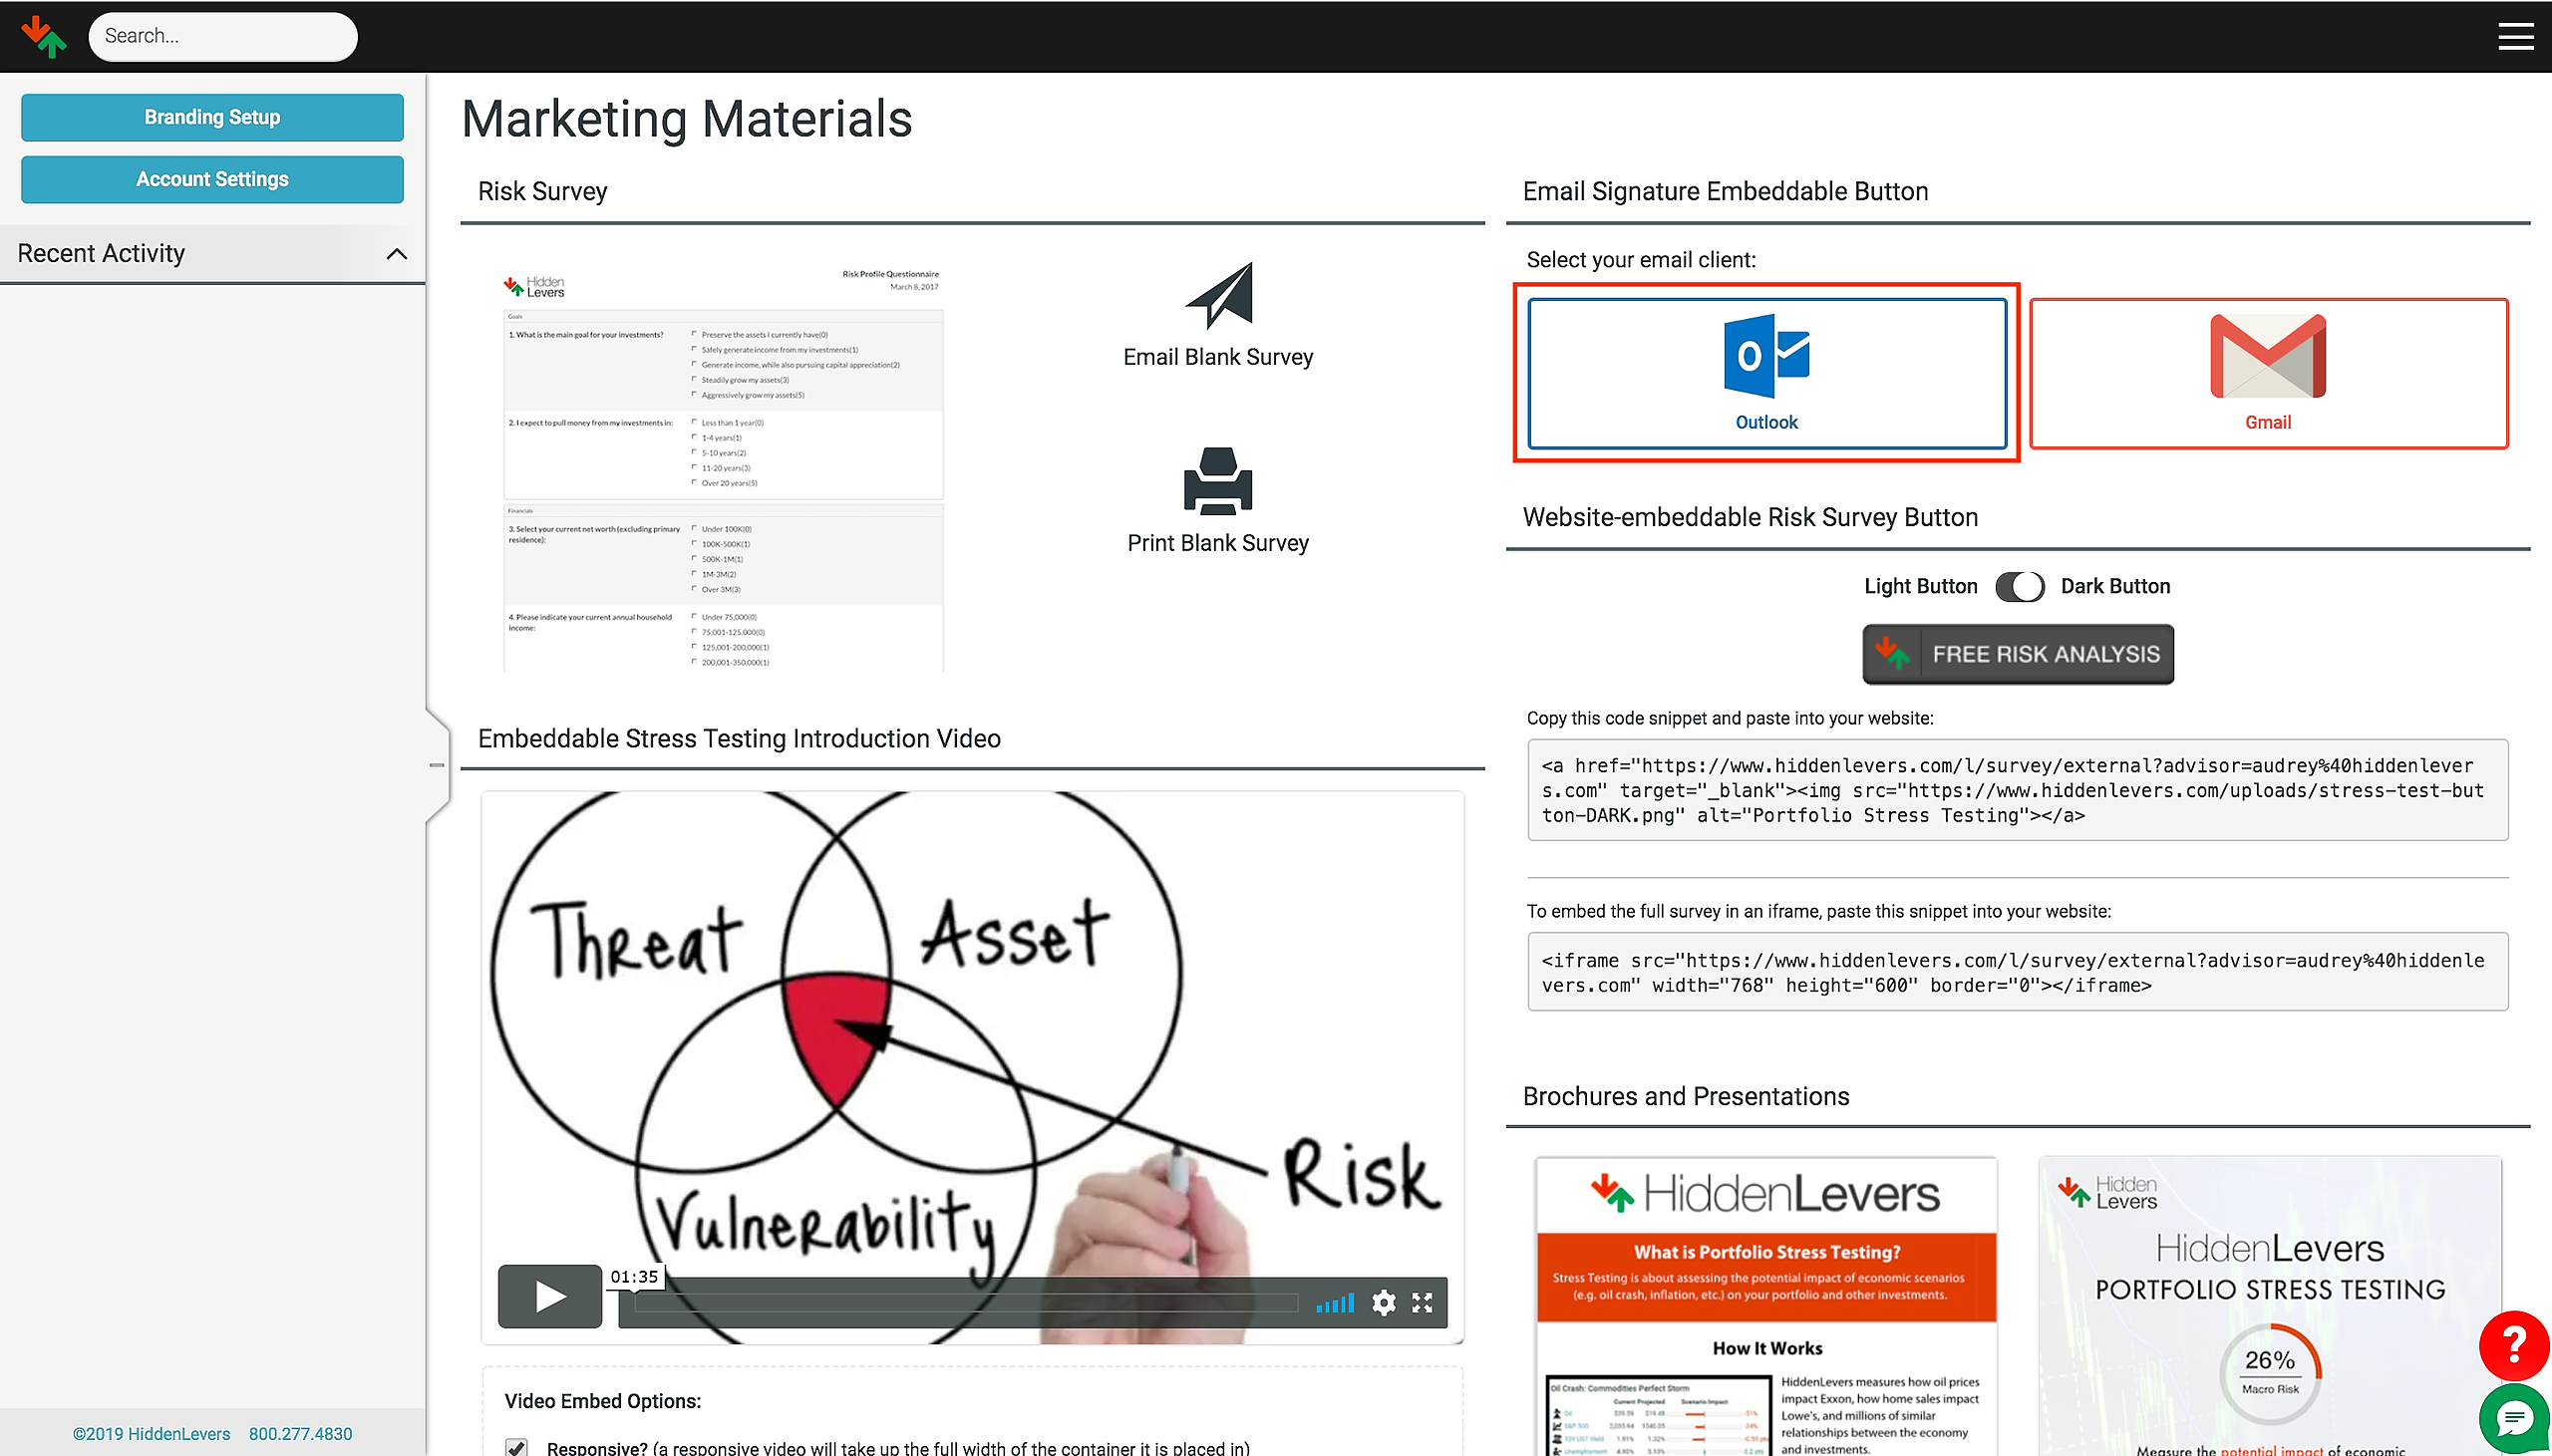
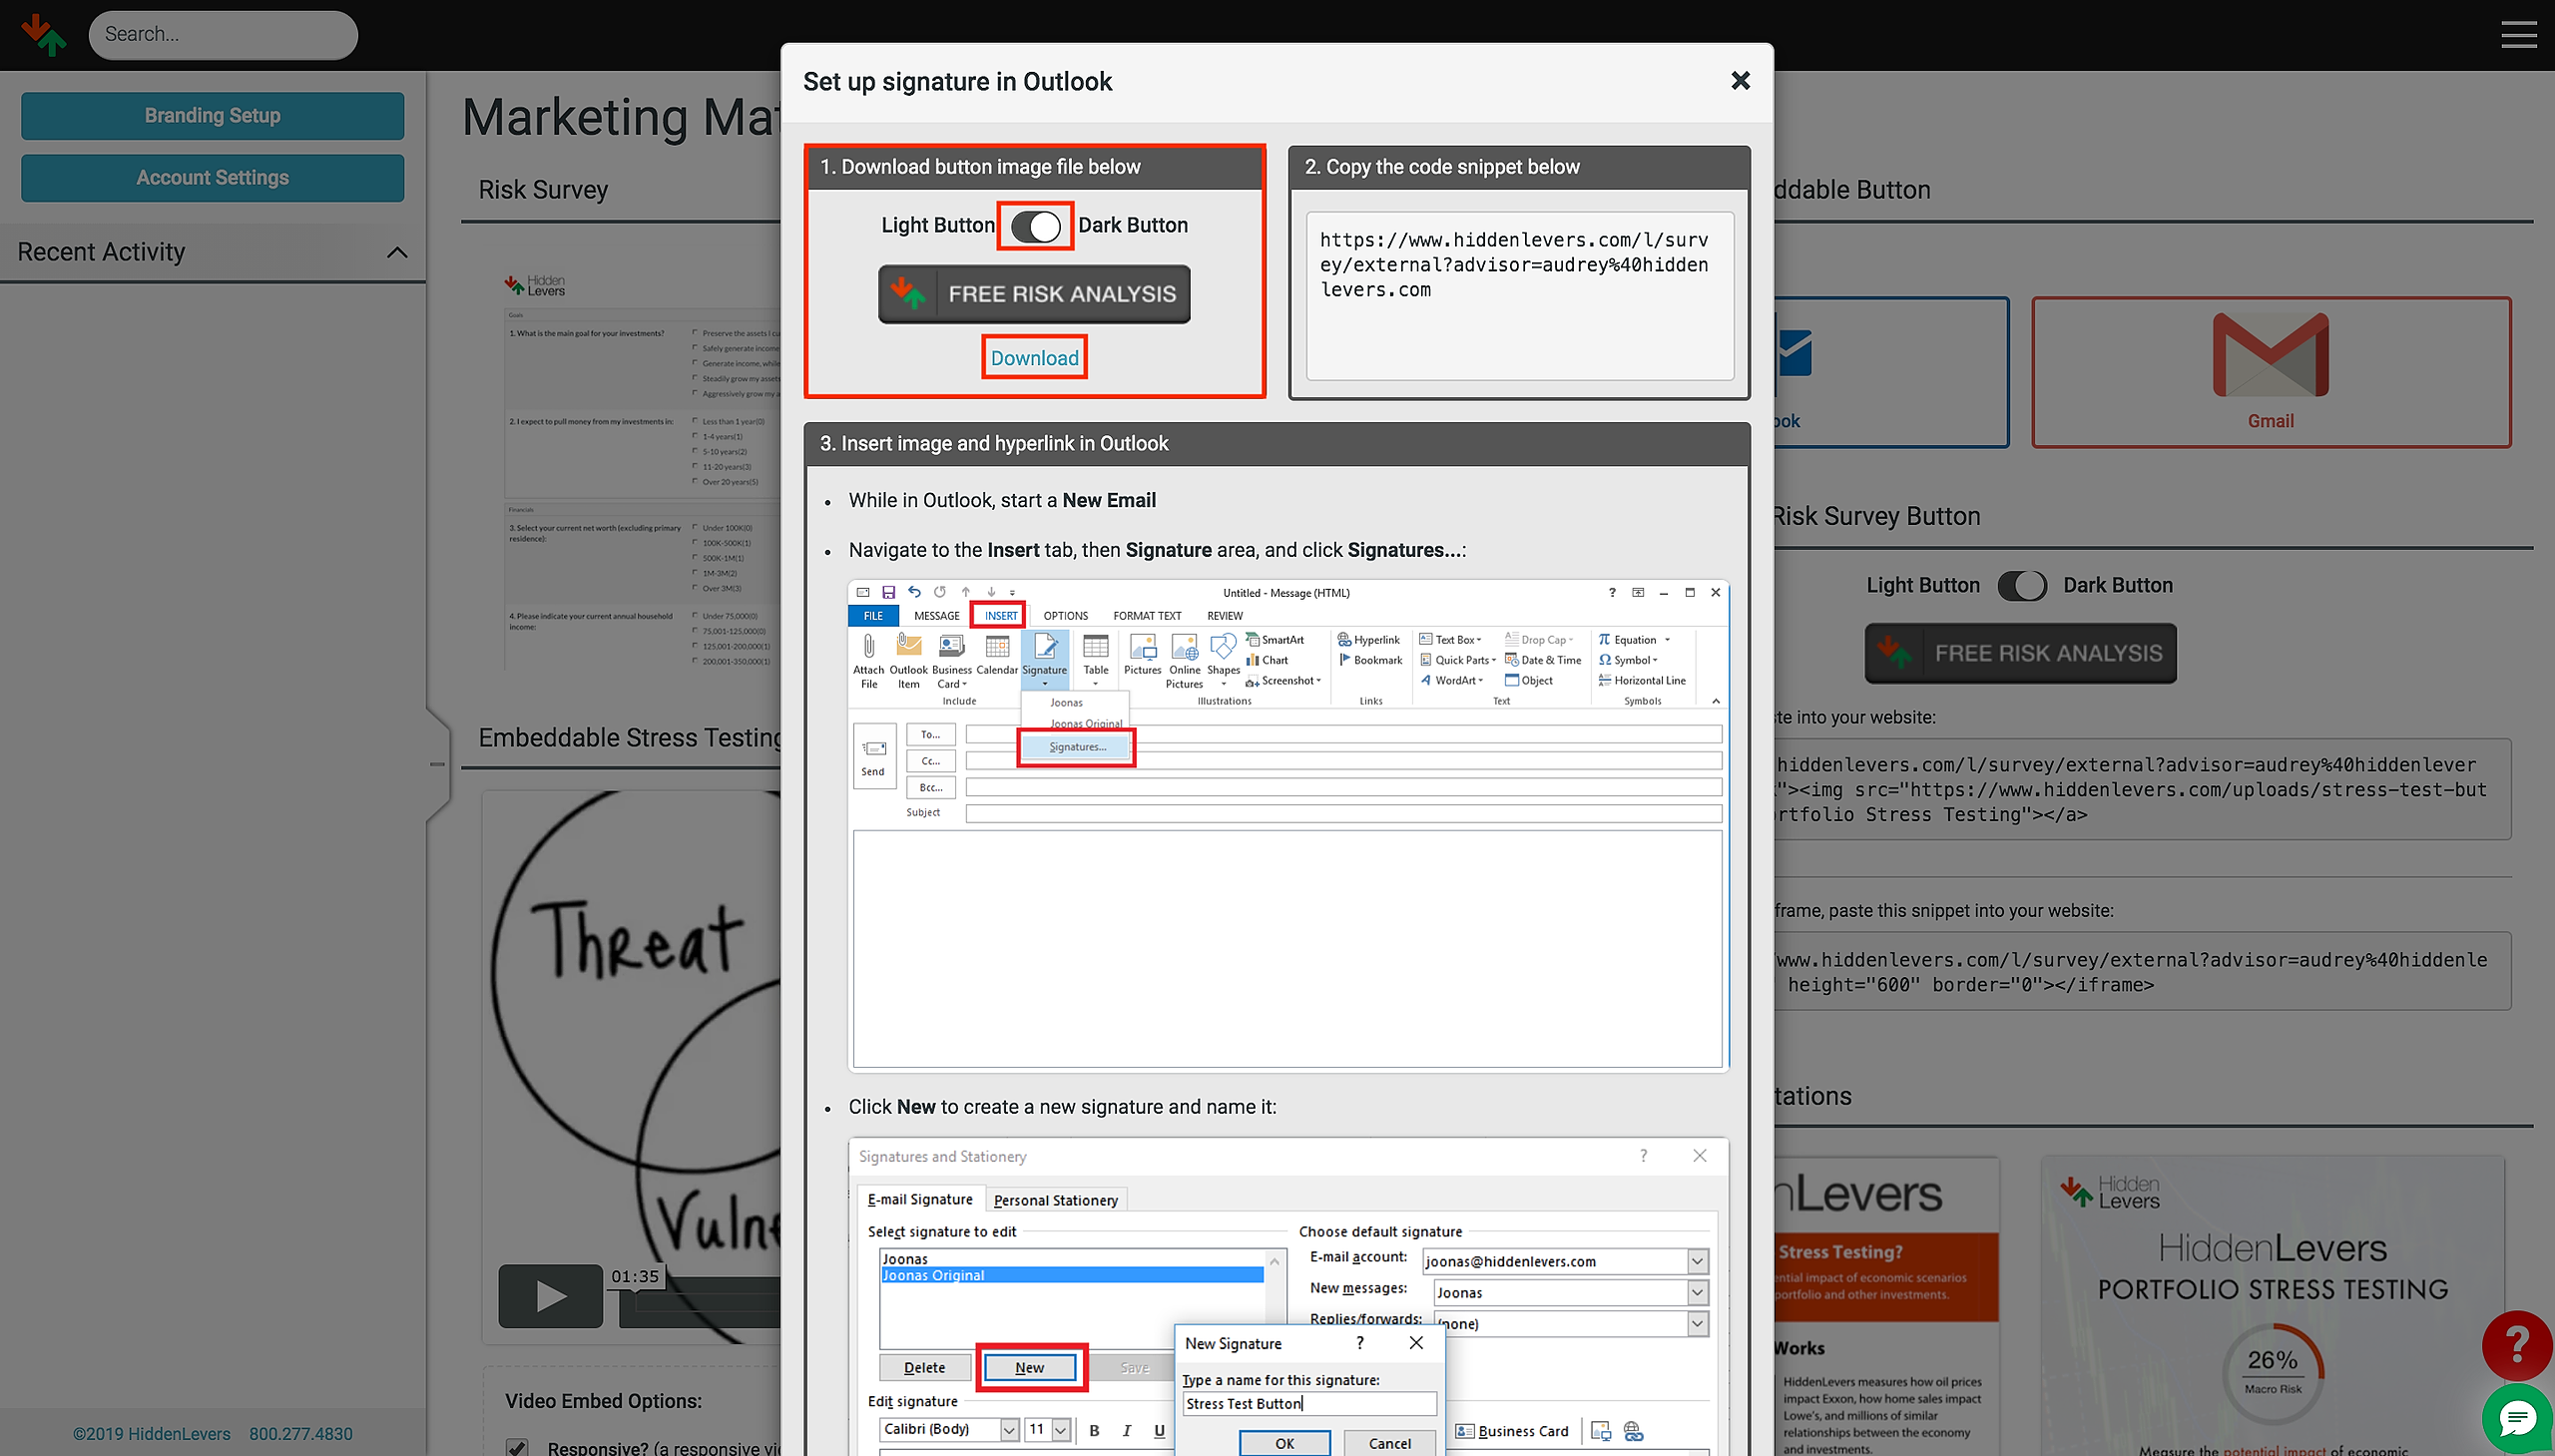
A window with the steps to embed the “Free Risk Analysis” button will appear, however, do not follow these steps as they are meant for PC users. We will only be referring to boxes 1 and 2 on this page. In the first box, you may select the color you wish for the “Free Risk Analysis” button. You may choose between a light or dark grey. Click the “Download” button, but make sure to select the color before you click download.
Now, go to your Outlook preferences and select “Signatures”.

You should see two boxes. On the left “Signature name” and on the right “Signature”. Click on the little + in the “Signature Name” box.

This will create a new signature, you can double click on it to rename it.

Then simply go to your desktop, drag and drop the picture you first downloaded, into the “Signature” box on the right. You can place it wherever you wish (and add more text if necessary).

Once the “Free Risk Analysis” button is positioned, right-click on it and select Hyperlink from the drop-down menu.

Go back to the Hiddenlevers instructions and copy the code snippet.

Paste the link into the address box and click “ok” when done.

You have more options at the bottom as to which emails you would like the signature to appear in. Once you have entered all the necessary information, you may simply exit from the window.